Using blocks to make Shape Art

Continuing our series this week on teaching shapes, we decided to make print art using wooden blocks from our toy collection!

I put together the art materials comprising of a carton box, some wooden blocks with different shapes as the base, as well as some colour paints.

IMG_7736

Identifying shapes on the blocks

Art has always been my girl’s favourite learning activity. Upon seeing the materials, she was excited to get started! First, I brought her attention to the wooden blocks and asked her what shapes she could recognize. She identified different shapes for various blocks, and for some, she could pin point more than one shape in one single block. One example was the prism. She could say out the square and the triangle shapes for the prism. This simple process sharpens her awareness of different shape surfaces for three-dimensional objects.

IMG_7740      IMG_7729

Printing of the shapes

To demonstrate, I placed a block on some paint, and showed my girl the base of the block. She immediately pointed out the circle shape to me. Then I made the circle print on the carton box by pressing on it. She was intrigued by the shape created, and couldn’t wait to make some more of her own.                            IMG_7735

She printed many circles with different colours and the experience of sensory art was amazing for her! She experimented with the other blocks, and gradually learned to recognise and predict the shape that would be printed with the block she has chosen! All this while, she was using her visual descrimination to ascertain which shape print would be made.

IMG_7747            IMG_7760         IMG_7778

My little artist was so engrossed with making the shape prints, that she filled the spaces on the carton box with colourful shape prints in no time! Check out her little masterpiece.. She requested for me to put it up for us to admire. I couldn’t feel any prouder of her little art achievement!

IMG_7780      IMG_7784

Artwork as visual reinforcement

Now, everytime she encounters her little print artwork, she will without fail point to it and say out the names of the shapes. There is no better way of reinforcing the new concepts than letting her create something she can take pride in and motivate her to internalise the learning on her own!

Matching Velcro Shapes

This is one of the activities I have planned out for this week of teaching shapes. She knew how to recognise basic shapes, and this is one of the introductory lessons to reinforce her concept of shapes, as well as expose her to print words of the names of shapes.

This simple activity develops these skills in your child:

1. Matching

2. Organisational skill

3. Visual Tracing

4. Shape recognition

5. Fine motor skills like Hand-eye coordination

To prepare the learning set, I printed out basic shapes like triangle, square, circle, heart,etc. I chose the same colour for every shape, so as to minimise unnecessary distraction for the learner since the focus here is on the concept of shapes. Then I cut out pieces of velcro and attached it to the shapes. You can buy velcro tape from Popular Bookstore or any local stationery store.

IMG_7721 IMG_7723

For presentation and storage, I placed all the loose shapes cut-outs in a separate tray by the side of the matching sheet.

IMG_7666

To begin, I presented the matching shapes to my girl, and read out the names of the shapes to her. For each shape, I asked her to point to the shape that was being read out. This is to reinforce her skill of shape recognition.

IMG_7643           IMG_7641

After recognising the shapes, I then repeated the process by reading out the name and asking her to find the same shape to match. She loves searching for the right shape from the side tray, as if its a hide-and-seek game for her! When she found the shape she was looking for, she enthusiastically matched it to the same shape on the learning sheet. While matching the crescent shape, she remarked, “Mummy, this is the same as the crescent on the Singapore flag!” I was pleasantly elated that she could recall the shapes found on our national flag, which goes to show her awareness of shapes in the environment around her.

IMG_7648         IMG_7650

After practicing two rounds of matching, she was able to interact with the learning materials independently. One of her delights doing this activity is creating the sound of the velcro being torn apart! Something that I love myself when I was a kid too!

IMG_7659

This is just another great example that I found online on creating materials that are fun and inexpensive!

Shapes on Ice-cream Sticks

This week, we started a series of activities on teaching shapes! I concocted this idea from the many ice-cream sticks I have. My girl, already recognised the shapes and I wanted to teach word recognition of the shape names. So I created this matching game using ice-cream sticks!

Materials:

1. Ice-cream sticks

2. Shapes cut-outs

3. Shape Name word cards

4. Ice-cube Tray with cover

5. Playdoh

6. Paper Cup

I presented the activity for my girl on the learning tray below:

IMG_7841 IMG_7845

For preparation, you can stick the shapes and their names on separate ice-cream sticks and place them in a paper cup.

IMG_7847

To start the activity, you can ask your child to put a little playdoh into each compartment of the ice-cube tray! Young children will love this tactile experience of kneading and manipulating the playdoh to fit into the compartment. It also helps them to learn how to estimate the quantity that is needed for each compartment.

IMG_7850

First, model the activity for your child. Place the ice-cream sticks with the shape names firmly into the playdoh in each compartment. Introduce 3-4 shapes for a start. Read out the names of the shapes as you put them one by one. Then match the shape to the names by placing them in front. After you have finished matching, repeat the naming of the shapes as you point to each set, for reinforcement.

IMG_7852 IMG_7866

Let your child try the activity out! You can place the shapes in front of the ice-cube tray, and let your child choose the shape to match.

IMG_7868

My girl loves this hands-on learning experience of matching the ice-cream sticks to the names of the shapes! I helped out sound out the first letter of the shape name, and it helped her tremendously to recognise the names of the shapes. After finishing one round of matching, she wanted to repeat the matching game again!

She was also mastering the skill of making the sticks stand upright, and discovered the solution of using more playdoh as the base. Talk about incidental learning!

IMG_7862 IMG_7869 IMG_7872

The next day, we played the matching game, only this time, I stuck the shapes first, and she has to match differently with the names of the shapes instead. Using a game creatively and differently is often a sure way to sustain their interest in an activity. It also helps them to apply the concepts in different contexts, and thus helps them to transfer the learning.

IMG_7971 IMG_7973

If you worry about the playdoh drying up if you can leave them in the ice-cube tray, it won’t happen if you get those that comes with a cover!

IMG_7890

You can also use this activity to introduce other new words such as animals, numbers, anything!

This is going to be a week of learning about shapes for us! Watch out for our next posts!

Word Recognition- Muffin Tray with Farm Animal Figurines

Farm animals is probably one of the first few themes that your child learns about. For introduction, you can read to your child picture books or interactive books on farm animals. Check out our list of English and Chinese books on farm animals.

20130828-202932.jpg

For this post, I am using the example of Chinese characters. To prepare the learning tray, I stuck the word cards in each compartment of the muffin tray. Three to six new words is about the right number to introduce to your child if she is fairly new to them.

IMG_7265

How to use the learning tray:

1. Point to each new word in the muffin tray and read out the words to your child.

2. Show each farm animal to your child and name the animal.

3. Then place the animal in the right compartment to match the word.

4. Repeat the same process until your child can name and match some animals.

5. Once your child is confident, let your child use the learning tray independently.

You can introduce other new words and animal figurines once they master the word recognition. This play-based approach can be applied to new English words.

IMG_7272 IMG_7277 IMG_7270 IMG_7271

Dramatic Play

In the process of using the muffin tray, my girl like any other child, likes to do imaginative play with the farm animals. She started narrating a story about the farmer getting the farm animals to line up and used the animal figurines to dramatise it. She lined the animals up on the side of the tray, according to the sequence of animals in her story. When you see your child having a play episode, seize the moment to allow your child learn through play! Make animal sounds and ask your child to guess the animal. Use descriptive words to describe the farm animals. It is through these playful moments that your child gets to pick up new vocabulary from you! 🙂

IMG_7282

Where to get the animal figurines:

I bought these from a party and toy supplies shop, which can be found in heartland neighbourhoods. The more expensive ones can be found in Mothercare or Motherworks.

Picture Books on Farm Animals

Children love learning about farm animals found in picture books about farm life.  Even though they don’t live on farms and get to experience farm life, children are particularly fond of exploring topics on animals and their characteristics. Cows, pigs, chickens are popular characters in picture books, which captivate the young readers and get them acquainted with names of the farm animals, and their individual characteristics!

1. There was an old lady who swallowed a fly (Illustrated by Pam Adams)

IMG_0009

This classic is one of the popular favourites with children. The text has a simple tune to sing along with, and it is catchy for any child to follow. It is about an old lady who starts eating farm animals (like fly,spider,bird, cat, dog…) in hope that the animal she swallowed will catch the previous animal. There is a simple rhyme to the text, and and it is a fun, repetitive book. The illustrations are colourful and visually appealing to the readers. Children love memorizing the sequence of the animals in the story. It forms almost like a food chain by the end of the story! This is a great story to teach naming of farm animals and even comparison of sizes among the farm animal species.

2. Who Sank The Boat? (Pamela Allen)

IMG_0006

This is my personal favourite of Pamela Allen’s books. This book is a perfect combination of wit, humor, anticipation and surprise, a homerun with children of all ages. The story is about five friends; cow, a donkey, sheep, pig and a small mouse who decided to get into the boat for a row.  The reader is invited to make a guess who will be the animal to sink the boat, as each farm animal gets into the boat one by one. The unexpected twist plays with the children’s expectations based on the logical reasoning of the weight and size of the farm animals. The hilarious ending makes for a wonderful read for both parents and children.

3. Mr Archimedes’ Bath (Pamela Allen)

IMG_0017

This is another classic from Pamela Allen. It is a humorous account of Mr Archimedes taking a bath with his three animal friends and the bath tub keeps overflowing with water. The mess is so unpleasant that he wants to find out who the culprit is. He used a measure and asks each animal to get out of the bath and finally discovers who it is. This is a scientific discovery for both the characters and the reader! The comical moments, the striking illustrations and the use of animal characters in the story makes it an interesting read!

4. Rooster’s Off To See The World (Eric Carle)

IMG_0010

The rooster wakes up one morning and decides he wants to travel the world. He meets many farm animals along the way like the cat, frogs, turtles, and invites them to join him on his adventure. The story is set in beautiful colourful, collage illustrations and beguiling, simple text. Eric Carle cleverly embeds the Math lesson of counting up and counting down in this exciting story. Eric Clarle wrote this book especially for children who has difficulty learning about numbers, and the symbolic stickers positioned at the side of the text helps children visualise numbers in its quantitative form.

5. The Little Red Hen

IMG_0005

In this old folk tale, the little red hen finds a grain of wheat and asks for help from the farm animals to plant and harvest the wheat. This ever-charming book teaches children lessons on work ethics like hard work or cooperation and character traits like helpfulness. It is also a cautionary tale about reaping what we sow. There are many renditions of this well-loved story that have sustained its popularity. It has a simple, yet powerful message for all to learn!

6. Chinese books on farm animals

IMG_0014 IMG_0015 IMG_0016

I found this series of Chinese readers on farm animals locally at Popular Bookstore. The illustrations are digitally done, with bright colours and clear drawings. I like it that the text is simple with easy to read Chinese characters, and each story features a farm animal with its physical characteristics, its abilities and its personality. The portrayal of these characters makes them very endearing and loveable. My girl loves this series so much that she could recite some simple lines after the fourth round of reading them! This is a great series to start your child on naming animals and talking about them in Chinese.

We will be adding more picture books on farm animals, with focus on the sounds they make!

Look out for our next post on teaching animal names as a follow-up activity after the introduction of farm animals through these books!

Crayon Rocks!

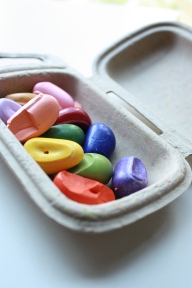
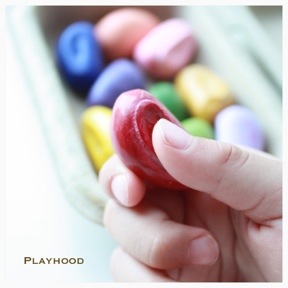
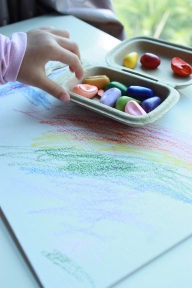
Have you seen these crayon rocks before? When my sister in law brought these back from an overseas trip for my girl, I was smitten with its vibrant colours, how child-friendly it is and its uniqueness! It makes any curious child want to grip one of these rocks and start drawing!

IMG_7799
Do you know that these crayon rocks are all natural soy wax crayons made from USA grown soybeans and colored with mineral pigments?

There are many reasons why these crayon rocks make great colouring tools for your child:
1.The colours are attractive and vibrant, and can be used on almost any colouring surface such as paper and canvas.

2. They are designed to develop fine motor skills, in particular the tripod grip muscles, and prepare your child’s fingers for writing

3. The shape allows small fingers to color in large, wide strokes creating rich colours and textures.

4. It is nicely packaged in a recycled paper box which makes it handy for you to bring it along for any drawing activity.

20130825-121215.jpg20130825-121232.jpg

Rae’s drawing experience with the crayon rocks

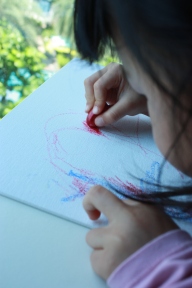
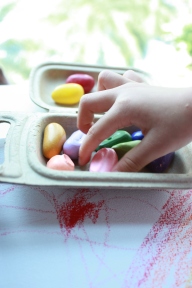
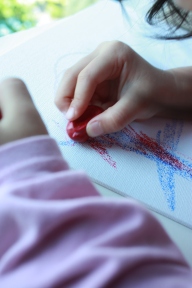
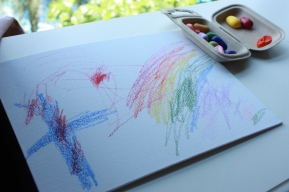
She started with the red crayon rock and her fingers fitted into the groove without much effort or coaching from me. She drew broad, bold lines across the canvas, creating rich colours on the canvas material. The colours don’t smudge at all, which also makes it mess-free and easy to use. After experimenting with the use of the rocks, she enthusiastically played with the other crayon rocks to add colour to her creation. I asked her what she was drawing, she said, ” The cross.” Almost symbolically, she added red strokes to the blue cross, which symbolises God’s sacrifice to me.

IMG_7816       IMG_7827                IMG_7814

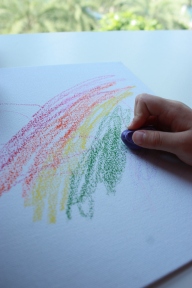
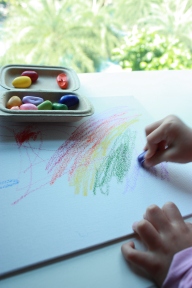
Without much hesitation after finishing the cross, she continued with a rainbow in the sky. I thought maybe the array of bright colours in the crayons reminded her of the colours in the rainbow! I helped her recall the sequence of colours in the rainbow, and it also incidentally turned into a teachable moment to teach her colour recognition.

IMG_7821        IMG_7826            IMG_7833

Look at Rae’s masterpiece! Prefect for a birthday gift for an Aunty! I titled it ” The Cross and God’s rainbow!”

These crayon rocks ROCK!!!

IMG_7830

Where to get the Crayon rocks

Motherswork, Great World City

Note to readers: This product review is strictly my personal opinion and I am not paid in any way to write this review.

Don’t BOX me up!

Cardboard boxes can engage toddlers and children for hours! Whats great is that boxes are easily available and free! It offers development of skills like creativity, resourcefulness and flexibility! With a little imagination, children can turn these plain boxes into spaceships, cars, castles! Children constantly reinvent, improvise and transform things and ideas in this creative process!

Our little Box Play!

In our previous post, we shared our all-time favourite books titled “Not A Box”.

20130820-123829.jpg

Reading the book really got us excited about playing with our own boxes! I searched high and low everywhere in our kitchen and our storage room for boxes, and other recyclable materials like toilet rolls. I presented my girl with the collection of boxes, in all sizes and colours on the rug, and she was raring to go play with the boxes!

IMG_7000

Amongst the printed boxes, she instinctively picked out the cereal box, examined the box, and pointed to me the word “Cheerios”. This is a great way to teach print awareness!

IMG_7001 IMG_7004

She further explored the other boxes and created this table with four legs.  She had a few incidents of the table falling over paper rolls of different lengths, which made her realise conceptually to make the legs of the table, she must have legs of the same length. She furthered discovered  that the legs must be evenly and positioned below the four corners of the box in order for the box to be stable!

IMG_7006

Buildings

All this while, my little girl’s mind was quick with ideas on how to transform the materials into pretend objects. She laid the same box on the rug, and this time, she places the rolls of different length onto it. Upon being asked what she was creating, she said,” Mummy, I am making buildings. She described the buildings as she pointed to them one by one, “An office, school, supermarket, shopping centre, Grandma’s house….”

IMG_7010 IMG_7015

Trains and Tunnels

To extend and deepen her play episode, I provided more props like trains. Associating trains with tunnels, she created her enactment of the trains traveling through the tunnels, but moving them through or down the paper rolls. To make the trains roll down through the tunnel, she cleverly elevated it by making it rest on the cereal box. And to level the paper roll, she placed it on top of the cereal box. Talk about learning a simple physics lesson!

IMG_7024                         IMG_7025

Train Station

My little girl then wanted to make a train station!  So she created one, with each train fitted into a paper roll to mark its parking space.  She also started naming them- Goofy, Mickey, Pluto, Minnie… well, you guessed it! Mickey Mouse Clubhouse characters! I kindda like this train station!

IMG_7027               IMG_7031                  IMG_7033

Making Letters

Rae has always played with ice-cream sticks and twigs to create letters. So almost intuitively, she took the paper rolls and embarked on creating letters of her own. She made Letter L, T, E…. and even a triangle shape. She experimented using only short paper rolls to make letter E, but replaced one roll with a longer one upon realising it needed to be longer.  It’s great to see how paper rolls of differing lengths come into play here for the creation of letters!

IMG_7070     IMG_7082       IMG_7077

So just give your child boxes, step back and watch the magic of their imagination at work!

Not A Box!

Title: Not a Box

Author: Antoinette Portis

Where to get: Available in public libraries and major bookstores

This book is one of my all-time favourites, a must-read book to tickle the imagination of a child! It is a picture book that is a great hit with adults too!

20130820-123829.jpg

It tells of a rabbit who insists that a cardboard box is not a box! The rabbit then imagines it to be many things in his mind. From a robot to a spaceship, the character travels places as far as his imagination can take him! The examples below show how the rabbit sits in a box and pretends he is in a racing car. Another instance in the book portrays the rabbit standing on the box and transports himself to a high mountain.

20130820-151500.jpg                20130820-151506.jpg

This book is highly creative and illustrates how children play with objects with boxes and engage in pretend play!

You will fall in LOVE with this book for several reasons:

1. Simple Text

It has a repetitive question and answer format echoing throughout the book. It provides predictability for emergent readers and the language chunks used in this book are great for children to pick up and use in their daily speech.

2. Clear Illustrations

It has simple colours like black, white, red, yellow that capture a child’s attention straightaway. The simple line drawings will also appeal to young babies and toddlers. These simple pictures will be especially visually helpful for children with autism or ADHD to pay attention to the story.

3. Taps on the child’s imagination

It offers opportunities for children to use their inferencing and predicting skills to imagine what the box can look like. They have to observe the visual cues of the pictures to imagine what it will represent.

4. Lots of teaching points!

You can use this book in many ways to teach different language use like prepositions (on, in, around), use of wh-question words (why, what) as well as the use of negation like the word “not”.

Look out for our next post on our own creative play episode with boxes!

IMG_7001

Meanwhile, start collecting boxes for your child!

Sensory Beans!

In my previous post, we talked about the importance of sensory play, why sensory bins are great for little toddlers and how to create the different types of sensory bins!

Click here to read more!

My Sensory Bin: Beans, Rocks and Shovels.

The ideas for this sensory bin came when my little girl was urging me that to bring her to play at the sandpit. So I thought of making a pretend sandpit right at home!

To assemble the bins, I found this little bath basin with separate compartments in the storage room. I put in black-eyed beans and green beans and some rocks. For props, I added in some sandplay play equipment like a shovel and rake. You can introduce a prop one at a time to prolong your child’s interest in the sensory bin.

IMG_7359 IMG_7364

My preschooler took to the sensory bin straightway as it looked so appealing and inviting! She used the rake to sift through the small beans, and produced the rustling sound of the beans. She then proceeded to feel the beans with her fingers, and I asked her how it felt. She said, “Small, hard, dry, and like sand.” This is one way you can get your preschooler to use language to describe her sensory experience.

IMG_7366 IMG_7371

Putting the rake aside, she decided to use her fingers to feel the beans in her palm.She cupped a quantity of the beans by scooping them with her open palm, and felt the beans drop through her fingers. She then experimented cupping the beans and closing her palm tight to hold more beans in. She then transferred that cupping action to the rocks. And she exclaimed, ” Mummy, this rock won’t drop from my hand.” She realised smaller objects can fall through her fingers easier than a bigger item. All this while I was just sitting by her side observing her interact with the materials, and she was constantly constructing new knowledge for herself!

IMG_7373 IMG_7378

The sensory play then progressed to her little ‘project’ of picking out the small green beans from the mix. She used her fine motor skills such as hand-eye coordination and pincer grip to pick out and transfer the green beans. This requires her to be very attentive and focused, and even though it was a tedious process, I observed she was immersed in it. She then made the new discovery, ” Mommy, the green bean is smaller than the black dot bean.”

IMG_7376

To extend the play, I started introducing new sandpit play equipment. She started using the props to transfer beans from one prop to another. She had to be extra careful not to drop any bean. I also reinforced her Math skill of numerals by asking her to count a small quantity of beans.

IMG_7381 IMG_7405 IMG_7414

IMG_7403 IMG_7400

Things to Remember:

This must be a supervised activity at all times! Small materials are choking hazards for babies and toddlers!

Allow your child room for creativity and imaginative play when she is using the sensory bins! Extend their play by providing prompts for more elaborate play scripts! Expand their vocabulary by asking questions that encourage to take observation of the materials, how the materials feel to their touch, and prompt them to use descriptive terms to describe the props or whats going on in their play episode.

What are Sensory Bins?

Why is sensory play important?

Children are constantly trying to make sense of the world around them. Babies and toddlers explore the environment and experiment through their senses.  Babies like to hold an object, look at it for a couple of seconds and put it into their mouths. This is how they gather and process new information.  When their senses are stimulated, the sensory input is sent to their brains, developing neural pathways which are essential for cognitive development.

Why Sensory Bins?

Sensory Bins are bins which contain everyday materials and props for exploratory learning and sensory play. You can find an array of different types of sensory bins all over Pinterest or educational blogs.

There are plenty of benefits that sensory bins can offer for your child! Children can learn to:

1. improve their fine and gross motor motor skills

2. Engage in child-directed play, where children when playing together can come up with their own rules and negotiations

3. Develop cognitive skills

4. Improve their language skills and expand their vocabulary

5. Be involved with imaginative play (Children keeps creating their own play scenes! They can pretend water to be the ocean for the animals, or learn to bake a cake using sand!)

IMG_7372        IMG_6580

How to assemble sensory bins

The best part I love about sensory bins is how easy it is to assemble them. You can just create a myriad of sensory bins to engage your preschooler with basically anything!!
Look into your kitchen, play room, craft materials,  garden, bathroom to see what you can use or recycle! It need not cost anything to put together a sensory bin! You can create specific themes, colour coordinated bins, or learning-specific bins.

Use a tray or deeper container to put the materials in. A deeper wider container will prevent spills. You can place it on a mat or play rug to prevent messes and make for easier clean-ups! Containers that have divided sections can also allow you to put in different types of materials, and can create opportunities for children to be involved in more complex play!

Possible Materials:

Rice, flour, sand, beans (all kinds), shaving cream, corn kernels, dough, dry pasta, shredded paper, leaves, dirt, twigs, cereal, oats, marbles, cotton balls, jelly, and basically anything!!

Props you can use for children to deepen their exploratory experience:

Figurines, blocks, shovel, cups, spectulas, spoons, pom poms, wire cleaner, toys, role-play props, forks, etc

20130526-213301.jpg

Things to Remember:

This must be a supervised activity at all times! Small materials are choking hazards for babies and toddlers!

Allow your child room for creativity and imaginative play when she is using the sensory bins! Extend their play by providing prompts for more elaborate play scripts! Expand their vocabulary by asking questions that encourage them to take observation of the materials, how the materials feel to their touch, and prompt them to use descriptive language to describe the props or whats going on in their play episode.