10 Frozen Fun Activities!

 10 Frozen Fun Activities!

The insane popularity of this Disney movie has gotten kids singing the theme songs in the malls, classrooms and kids’ playdates.

Tapping on my little girl’s interest in the movie hit Frozen, I have decided to capitalise on that to come up with 10 different sensorial and learning activities!

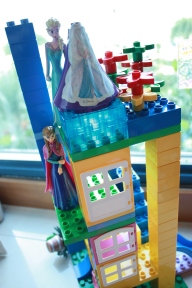
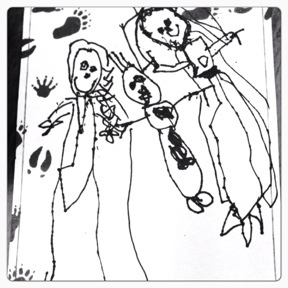
1. Pretend Play

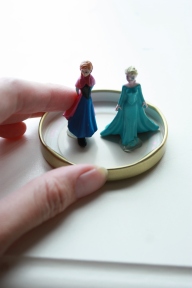
My 3 year old has been so captivated by the characters in Frozen movie, that she does all kinds of pretend play with her princess dolls.

I enjoy watching and being amused by the play scripts my girl comes up with whenever she is engaged in pretend, dramatic play. The latest being the conversations and songs between the Frozen sister, Elsa and Anna

IMG_9542

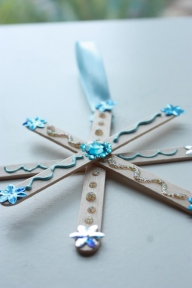
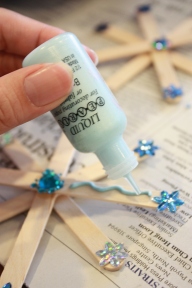
2. Making a Snowflake!

Snowflake Ornament

Tying in with the Frozen Movie craze, my gal has been fascinated with the idea of snow despite our hot humid weather all year round.

I thought why not let her experience deeper with the concept of snow by making a snowflake ornament, with the colour theme blue, so as to add to her Frozen props for role-play!

IMG_9488     IMG_9478

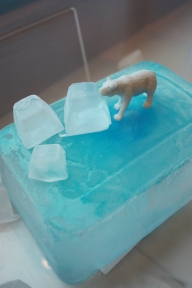
 3. Frozen Ice!

Frozen Fun!

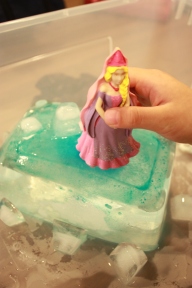
I thought to make the play scene more elaborate and sensorial, why not create some frozen fun for her with some ice blocks and ice cubes?

To make the ice blocks, simply recycle your plastic containers, add some blue food colouring and freeze it overnight! And you are ready to enact the play scene!

IMG_9424IMG_9455

4. Frozen Snow Globe!

Frozen Snow Globe!

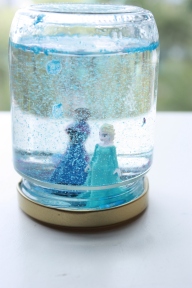
One of my favourite activities is to come up with a snow globe, based on the theme of snow and winter throughout.

The shimmering magic of snowfall is always transfixing, whether s it winter or not for your season.

These globes allow your child to create a wintry scene straight out of their own imagination.

IMG_9502   IMG_9517

5. Storytelling with the books!

Nothing like retelling this heartwarming plot through the use of books! Allow your child to experience the depth of the characters and seeing the story come alive through the use of beautiful illustrations!

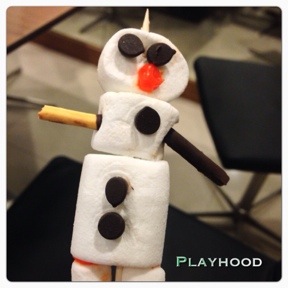
6. Olaf Marshmallow!

Kids will love this food making activity! Just get marshmallows, chocolate chips, raisins and some orange icing and they are ready to make the adorable snowman that is also edible!

20140610-163032.jpg

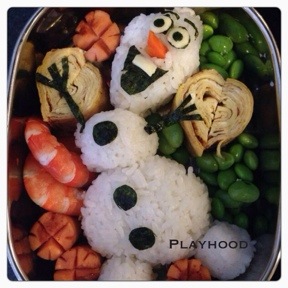
7. Olaf Sushi!

Thanks to my sister-in-law who ingeniously created this incredible Olaf Sushi! This is too cute to be eaten, but my girl gobbled it all up in no time!

20140610-163135.jpg

8. Stickers

Why not add some magnetic tape on the Frozen character stickers and create props for the children to enact scenes from the story on magnetic whiteboards?

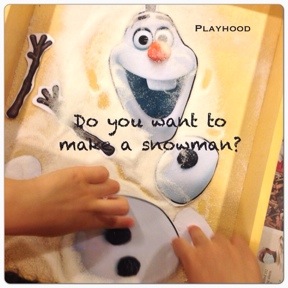
9. Making an Olaf Snowman!

You can create a Olaf tray where the child has to assemble the different Olaf snowman body parts together!

20140610-163112.jpg

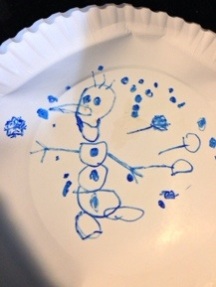
10. Colouring & Drawing

For some quiet seat work, colouring is great for them to focus and fill the pages of their favourite characters with colour! Drawing the characters out also stretches their imagination and builds their attention to details. We were at a play date when the kids started drawing the characters on white sheets and even on paper plates!

For colouring pages, just google Frozen Colouring Pages

20140610-163000.jpg   20140610-163053.jpg

Have an icy blast with the kids with these activities! 🙂


10 Kids’ Craft from Recycled Materials!

Wondering how to ignite creativity in your child? Making recycled art is one of the wonderful ways of nurturing creativity as well as imparting values such as care for the environment.

The kids will be surprised to see for themselves what kind of things they can create out of everyday ‘junk’! Using simple discarded materials help them to reinvent and rethink how they can be re-used and re-created to morph into art masterpieces beyond their imagination.

I started this project with my class of 6 year-olds. We were doing thematic activities based on neighbourhood, and the children brainstormed on different vehicles and buildings. It was a take-home project where the children get to create the models with their parents. The collaboration between parent and child was strong, stemming from a joint discussion on what to make, and what materials were most suitable as well as the process of creating art. Some children take the cue from their parents and they embarked on this wonderful learning process of creating their final product.

Here I showcase some of their brilliant work! Enjoy the creativity!

1. Trains

IMG_9386

2. Tank

IMG_9388

3. Houses

IMG_9390   IMG_9394  IMG_9405

4.Buildings

IMG_9384


5. Rocket

IMG_9397


6. Digger

IMG_9399


7. Buses

IMG_9407

8. Racing Cars

IMG_9409   IMG_9413

9.  Ship

IMG_9420   IMG_9421

10. Van

IMG_9418


Maxilla-Book Review and 5 Book Activities!

Book Review- Maxilla

IMG

When my friend, Lianne first contacted me to do a blog write-up for her newly published book, “Maxilla”, I couldn’t be prouder of her! I have always been an ardent fan of local writers and illustrators, as I strongly believe they have so much to offer in terms of creating a local context for children to relate their daily experiences to, as well as showcasing their storytelling and artistic flare. So you can imagine how elated I was to receive this book! By our very local writer!

In this picture book, Lianne recounts her own boy’s magical experience with a caterpillar, and how a greater lesson of letting go comes through the storyline. The main character, Reuben found a caterpillar in the garden, named it Maxilla and hoped to see it transform into a butterfly. However, he found out that Maxilla can only survive in a natural habitat, otherwise it may die. Reuben is then confronted with the tough decision of whether to set it free or keep it.

Although this picture book resembled the theme in the all-time favourite- The Very Hungry Caterpillar, it carries a deeper, more personalized meaning for young children. Children can easily relate to Reuben’s struggles of letting go, especially when they want something so badly. And the embedded message is when you choose to let go and do what is best, you may just be surprised with something remarkable!

My first reading with my little 3-year old was amazing. She was enthralled and captivated by the colourful, realistic illustrations. She could also relate with the main character in the story as we too had an amazing encounter with some caterpillars once! She could recall her past experience of watching her caterpillars metamorphosise into moths.

5 Awesome Activities Based on Maxilla

This book is rich in its potential to bring forth several learning objectives in terms of language, math and science! Based on this book, I have come up with 5 activities for my preschooler girl.

1. Caterpillar Art

For this simple art activity, simply re-use your little tea cups or bottles to make circle prints for the caterpillar! My little girl had so much fun making adjacent circles and seeing the caterpillar emerge in no time! She then requested to paint the caterpillar body green, as she recalled the illustration from the book Maxilla. She said she wanted the same caterpillar as Reuben in the story.

IMG_9273    IMG_9320    IMG_9329

2. Counting Caterpillar

The idea of using the circles to learn counting came to mind straight away when I was thinking up of a math-related activity to do. Simply write consecutive numbers on circle cut-outs, and you can create several caterpillars with numbers from 1 to 10, 10 to 20, and so on. Your child will be extremely motivated to line the numbers in sequence to create the caterpillar! It’s a great way to teach your child how to count using one-to-one correspondence!

IMG_9331

3. Subtraction Story

For older children, your child can come up with a subtraction story, where they imagine the hungry caterpillar eating up food items. You can use food cut-outs as visual aids for your child, and simply write out a subtraction story. Then come up with a subtraction sentence and number bond representation for the story. This method helps to contextualize learning for your child since it is a book-based activity, and also interests your child to pick up beginning concepts of subtraction. I did this activity with my class of 6-year olds and they love it!

photo (7)

4. Butterfly Snack

I saw this lovely idea online and decided to try making some butterfly snacks for my girl and her classmates. We went to the supermarket to browse through the selection of nuts and cereals, and turned out to be a very enriching experience of getting to know the various types of nuts and cereals! She then worked with me to decorate the clothespins and her eyes sparkled when I put it together to make into butterflies! It is a wonderful way to entice your little one to eat healthy!

IMG_9346    IMG_9343

5. Butterfly Kit

This is probably our favourite activity to do! Learning science is simply about tickling your child’s curious mind. Providing a sense of wonder and curiosity is the first steps to getting your child excited about learning about the objects around them. This picture book is ideal in introducing the theme of insects or caterpillars to your child! You can easily get a butterfly kit from Oh Farms, and let your child have an experience of caring for their very own caterpillar and watching it turn into a butterfly! Through it, the lesson on the life cycle of a butterfly takes on greater meaning as they  experience it first-hand for themselves! Remember to document the whole process with photos and dialogues with your child, and it can become a long-lasting memory for your child!

You can find out more about purchasing your butterfly kits from this website http://www.ohfarms.com.sg/products/butterfly_kits

Author Biography

Lianne Ong is a freelance writer who writes primarily about parenting, education and fashion. Maxilla was written based on events that happened when her family was living in California. She now lives in Singapore with her husband and two children, Reuben and Phoebe.

Maxilla Book

Grab a copy of Maxilla picture book at all major bookstores in Singapore (Kinokuniya, Times Bookstore and MPH Bookstores) at only SGD $10.60!

For our overseas readers, it is also available worldwide at MPH Online!

For more information on Maxilla, do visit the Facebook Page

https://www.facebook.com/MaxillaTheBook

(FYI, I do not receive any monetary reward for writing this book review! It’s all for the love of supporting our local writers! 🙂

photo 1 (16)

This blog post is published in The Preschool Survival Kit Magazine distributed to all preschools in Singapore. 


10 Playful Ways To Learn Addition & Number Bonds!

Number Bonds and Addition

Number bonds and addition are building blocks to the basic concepts of Math. Learning to count is probably one of the first Math skill children acquire, and through that they understand relationships of quantities and their relationships to other numbers. Addition is one important application of this understanding. Children at young age need not memorise addition to master the concept of addition. They simply need a lot of manipulatives and concrete materials coupled with ‘acting out’ the process of adding to help them count summative quantities. This skill lays the foundation for mastering more complex Math concepts such as subtraction, multiplication.

We have come up with 10 playful ways to learn number bonds and addition, effortlessly and with lots of fun!!

20140220-003324.jpg

1.   Muffin cupcakes/ paper cups, and ice-cream sticks.

Get creative and make this concrete number-bond game. To reinforce part-whole relationship, simply write “part” and “whole” on the paper cups. Then place different number of pebbles, lego blocks, marbles or beans into each part. Transfer both amounts to the “whole” cup to show the process of adding the two parts to make whole. You can ask your child to make the addition statement: 3 and 5 make 8

IMG_9178      IMG_9173

2.   Rock Dominoes

You can go for a garden walk with your child and pick up these lovely stone pebbles. Simply use correction ink or permanent white pen to draw 2 quantities of dots with a dividing line on the pebbles. Create different number combinations. Write number bonds and addition sentences with each number combination.

IMG_6733    IMG_6725

Addition Sentence

3     +       4    =      7


3. Number Dices in a Jar

Simply put 2 dices in a jar, give it a shake and you will have two numbers to make a number bond and write an addition sentence!

IMG_6574

4.   Fish crackers

Use two small bowls or paper plates. Have your child put different number of fish crackers or biscuits. Write out the number bond and addition sentence with the numbers. The best part about this activity is eating them up!!

Fish crackers on a bar chart!

644629_10151618594698534_2055719070_n

 5.   Clothes pins and Ice-cream sticks!

Simply write different numbers on the clothespins and create different addition sentence. Your child can practice learning how to add numbers!

unnamed

6.   Lego Blocks

Write some numbers with addition symbols and ask your child to create addition sentences!

photo (2)

7. Ice-cream sticks and Dot stickers

Simply stick stickets dots on ice-cream sticks, choose two sticks and add the two numbers! The fast learners can learn to make mental addition and make it into a game!

photo

8. Clothes hanger and Clothes pegs!

I saw this idea on the internet and it is really a cool way to learn addition! This home material is easily available and your child can also hone their fine motor skills by hanging the pegs on the hanger. Your child can come up with 2 different quantities to add!

20140217-185348.jpg

9. Paper Rolls

Just cut up a toilet paper roll and write two numbers and create a whole lot of them. Ask your child to stack up two numbers on top of each other, and add!

20140217-185434.jpg

10. Play dough and Buttons!

Play dough time is fun when your child gets to press buttons on it! Just ask your child to add up two quantities of buttons! 🙂

IMG_6536

Chinese New Year Gold Coins

You can’t miss these glittery, gold coins during the Chinese New Year season! These gold coins are supposed to signify prosperity and good luck. My little one was drawn to these coins straighaway! Besides being a great chocolate treat, these coins can be used for learning in 5 great ways!

IMG_9137 IMG_9135 IMG_9140

1. Counting Numbers

Simply use the coins for this Math Montessori idea! Teach your child how to count by using one to one correspondence according to the number cards shown!

IMG_9148

2. Dollars and cents

Show the money equivalent by matching the dollar value with the right number of coins. This is a great to teach value of dollars and the different dollar denominations!

IMG_9151

3. Creating shapes!

Get creative by making different shapes with the gold coins! Your imaginative little one may just surprise you with different shapes to make up a picture!

IMG_9156 IMG_9155

4. Letter shape and recognition

You can also create letter awareness by asking your little one to make different letters! This enhances your child’s letter recognition and interest in the alphabet. Along the way,you can also teach phonics sounds!

IMG_9168

5. Comparison of quantity (more or less)

You can also use these beautiful coins for comparison of quantity! Simply stack up quantities like 3 coins and 8 coins and introduce concepts like ‘more’ or ‘less’ by asking your child to compare the different quantities. This helps your child to make visual discrimination of the different quantities.

IMG_9170

10 Great ideas to teach name recognition and spelling

This is a brand new year and school has just started for our little ones! Going to school and coping with all the demands of learning can be a little daunting for our preschoolers, especially those first-timers! Teaching them to recognize and spell their names might be the first step to adapting well to school life 🙂

Why recognising and spelling names is important

Learning to recognise and spell their names is one of the significant milestones in terms of language development. Recognising their names on their belongings and activity sheets helps them to take ownership over their possessions and also orientates them around the premise like knowing which shoe cubicle thy should leave their shoes in when they enter school, and which activity sheet to work on with their names written on it. It also helps them in their transition during different segments of the day like recognising and picking out the correct water bottle and snack box with their name labels during meal times.

We have come up with 10 simple ways you can teach your child how to recognise and write her name! Simply by using things and objects in your own home! 🙂

1. Ice-cream sticks

IMG_9100

2. Foam letters

IMG_9089

3. Toy trains or cars (Boys will love this!!)

IMG_9087   IMG_9088

4. Muffins paper cups

IMG_9107

5. Bottle Caps!

IMG_9091

6.Pebbles

IMG_9097

7. Clothes Pegs!

IMG_9102

8. Scrabble Chips!

IMG_9103

9. Lego blocks!

1240098_234381163376812_303480529_n

10. Paper rolls!

IMG_7070

10 Fun Activities on Word Families!

Language Development

Word families are groups of words that have a common spelling pattern – they have some of the same combinations of letters in them and a similar sound. Words like cat, hat, and fat are a family of words with the “at” sound. Children progress as better readers when they can identify chunks in words like word families (e.g. Words ending with -at, -in) In teaching word families, children learn how to blend sounds (like c-at, b-in). It helps them to decode words faster, improving their word recognition skills as well as spelling skills. Reading books with lots of rhymes like Dr Seuss also helps develop their phonological awareness.

For emergent readers, after they have mastered the phonics sounds, they can proceed to learn word families or words that rhyme. Some word families you can start with are -at, -in, -ig, -an, -ing, -ot.

I have come up with a series of fun and hand-on activities for your beginner reader to pick up new words quickly and enjoyably! Here goes:

1. Sliding Cards!

You can also create word family cards with a movable list of beginning sounds ( an idea that all phonics teachers are familiar with!). Just slide the card up and down & blend the different beginning sounds and the rime (-at, -in) to help them read. First introduce and read the rime ( e.g. -at, -ot). Model the blending slowly for the child by emphasizing the beginning sound, then blend it with the rime. With practice and repetition, the child will be able to see the word patterns in the word families, and effectively decode the words for pronunciation. This activity is visually stimulating and hands-on for little readers!  You can create pictures of objects or animals on the cards that interest your child! Have fun!

183130_10151636215138534_1591308804_n 405812_10151636215058534_356495284_n 942893_10151636215253534_46281740_n

2. Word Family (Onset and Rime) Blocks

For this activity, I created a word family game using some wooden blocks from your child’s collection. Just glue different beginning letter sounds on the blocks. Rotate the block to create different words in the same word family like -at. Or play a game where the child tosses the block like a dice and blends the sounds together to read the word

943258_10151636211048534_1595601587_n  417848_10151636214978534_577650863_n

 3. Paper rolls and balls!

Just gather some toilet rolls and plastic balls! You can also use pong pong balls or golf balls! Print out the words and pictures and stick them on. You can blend onset (beginning sound) and the rime (-at) for your child. Then in your second round of reading the words, you can ask your child to pick out the right picture that matches the correct word. With practice and repetition, your child will be able to see the word patterns in the word families, and effectively decode the words for pronunciation. This activity is visually stimulating and hands-on for little readers!

IMG_8795     IMG_8782

4. Scrabble Letter Chips

To prepare the tray, simply select the scrabble letters for the word family (example:-at) , and various beginning sounds (example: c,b,r,m) for the child to explore different rhyming words. You can use a mini blackboard for my little girl to arrange the chips. I love how this simple activity is so hands-on and concrete! It makes blending of sounds and picking of new words so engaging and interesting!

IMG_8838     IMG_8847

5. Plastic Eggs!

You can find these lovely egg containers at toy stores or during Easter season! Just stick the different beginning sounds and twist and turn it to blend into various words in the same word family!  I have these lovely eggs in a basket, and they certainly will capture your child’s attention! This is one hands-on idea that will definitely be a big hit with kids learning to read!

IMG_8835  IMG_8901

6. Wooden Letters

Gather all the wooden or foam letters in your house and create word families for your child to play with! Simply print out pictures to match with the words, and your child will learn about the meaning of the words effortlessly!

IMG_8861    IMG_8862

7. Clothespins!

This is one cheap and easy-to-make material! Just stick letter labels or write the letter on the clothes pegs with a marker. Clip the clothes pegs on an ice-cream stick to form each word in the word family. As you blend the beginning sound, simply slide the clothespin with the beginning sound (s) towards the ending rime (-it). Join the letters together to form the full word!

934820_10151636218963534_1138339667_n 923263_10151636219183534_1857835679_n Using clothespins to teach word families

Using clothespins to teach word families

8. Pebbles!

Simply write the letters on pebbles to create rhyming words! Let your child explore this tactile activity of holding and grasping the concrete material!

484177_10151518706898534_1021826925_n

9. Word Family Calendar!

Simply recycle your used calendar, and cut it into two parts. Paste beginning sounds and ending sounds on both sides, and get your child to flip the pages to create rhyming words for the same family!

IMG_8905

10. Read Books with Rhymes!

Reading is a sure way to get your child to develop phonemic awareness of rhyming words! Dr Seuss and many other phonics readers are great in familiarizing your child with rhymes!

10 Activity Ideas for Goldilocks And The Three Bears!

Based on the much-loved tale of Goldilocks and The Three Bears, we have come up with 10 perfect activity ideas for your little preschooler at home or children in your classroom. Your children will love reading this classic and doing these activities as fun extensions!

20131011-111603.jpg

Skills covered in these activities:

A. Fine motor skills such as weaving

B. Math skills such as counting, comparing sizes, and one-to-one correspondence.

C. Language skills such as using adjectives, antonyms, word recognition and narrative language for pretend play. 

Go read the fairy tale and immerse your child in these wonderful 10 activity ideas!

1. Antonyms (Opposites)

Allow your child to learn about opposites such as hard, soft, cold, hot, rough, smooth, by using this sensory bin as touch game. Fill a basket with objects of opposites, and watch how your child use her senses to differentiate the opposite properties. This is also a great sorting activity!

IMG_8504     IMG_8511     IMG_8251

2. Counting using One-to-one correspondence

The number 3 is mentioned repeatedly throughout the story- 3 bears, 3 beds, 3 chairs and 3 bowls. The book is a great context for your child to learn counting, using one-to-one correspondence in this counting game. The number chart helps your child to visually understand comparison of quantities for each number and concepts such as “more” or “less”. Simply use some bear biscuits and a number chart and your child will be delighted to try it out, and gratify herself with a nice treat after!

IMG_8649 IMG_8676 IMG_8665

3.  Weaving Bear

This is a Montessori-inspired practical activity! Cut out a bear figure and use a one-hole puncher to make holes for your child to weave through! It trains your child’s fine motor skills and concentration. My girl had tons of fun toying with the shoe lace and pulling it up and down through the holes!

IMG_8611      IMG_8602      IMG_8597

4. Pretend Play!

Having this sensory bin will definitely appeal to your child to do some pretend play and role-play. Re-enacting the story is made fun with these concrete, hands-on props! Pretend-play is great for your child to practice skills like story-sequencing, recalling events, using a narrative script as well use of new language words from the book. My girl was parroting the repetitive phrases/ language chunks as she re-tells the stories with lines from the story like ” This porridge is too hot! This chair is too hard!” Its wonderful to see how the story comes alive in my preschooler’s pretend play script and dramatization with the props!

IMG_8686     IMG_8705    IMG_8711

5. Comparing Sizes

To teach concepts of big, medium and small, I came up this matching activity with picture cards of varying sizes. My little preschooler loves assigning the right size of objects to each respective bear character and indirectly learning how to arrange objects according to size. You can also introduce matching with word cards like “Big” “Medium” “Small”.

IMG_8724 IMG_8735

6. Role-play using Magnetic Characters

This is another way of getting your child to do pretend play or role-play. Simply put magnetic strips behind the characters and the props and your child is ready to engage herself with some story-telling on the magnetic easel board.  Great activity to occupy your child!

IMG_8619

7. Contextual words

Create this simple sensory bin , where picture cards are hidden in rice, beans or pom poms! Learning new words becomes fun and sensorial when your child gets to dig out the right picture card to match the word. Learning new words never get this fun!

IMG_8534    IMG_8541

8. Scavenger Hunt

Get your child busy searching  for objects around the house by going on a scavenger hunt. These words are extracted from the story and I printed them out to make word cards. Get your child to take a photo of the object with a camera, print it out and get your child to match the photo with the word!

IMG_8726 IMG_8730

9. Readers’ Theatre

Readers’ Theatre is a great way to dramatise the story with a group of children! Get ready some scripts, masks for the main characters and you can have a theatre show right there!

10. Read, Read, Read!

Your little one will never tire of reading this book over and over again! These book-activities are sure to get your child craving for more readings! Your  child is sure to pick up new concepts from each new reading, and you will be surprised how quickly your child can internalise new words when learnt contextually from the book!

20131011-111603.jpg

 This blog post is published in The Preschool Survival Kit Magazine distributed to all preschools in Singapore. 

photo 1 (16)

10 Fantastic Activity Ideas on Shapes!

We came up with a list of 10 wonderful activities to get your child excited about learning about shapes! Get ready to Shape-up!

For more detailed description of some of the activities, click on the titles.

1. Matching shapes with Velcro

Create this simple matching activity with velcro. Your child will love the hands-on experience of matching the shapes and learning about the names.

IMG_7721 IMG_7650

2. Making A Book Of Shapes

Create this little artbook by using sponge and paint to print on the shape stencils! Your child will love making her own book of shapes! She will be reading out the names of the shapes from her own book in no time!

IMG_7679 IMG_8108

3. Step on Shapes!

Print out shapes and paste them with tape on your floor. Play a little game with that! Read out the name of a shape and ask your child to step on it, put her nose on it, press on it, sit on it with each different shape being called out! You can also hand out the names of shapes on cards and ask your child to match it with the correct shape!

Your little kinesthetic learner will love this physical, fun activity!

IMG_8058 IMG_8062 IMG_8091

4. Printing Shapes Using Play Blocks!

Do you have blocks at home? Try using them to print shapes on a carton box and create a masterpiece of shapes! They get to learn about shapes on different surface areas for each 3-Dimensional shape. It sharpens their observation skills for recognising shapes on objects.

IMG_7760 IMG_7780

5. Matching Shapes using Ice-cream Sticks on Ice-cube Trays

This is an extremely fun activity for my child to learn word recognition! You just need an ice-cube tray, ice-cream sticks and play dough and you are ready to go! Your preschooler will be occupied with this activity for many minutes!

IMG_7862 IMG_7850

6. Read Books about shapes

Reading books is a marvelous way of introducing shapes to your child! There are many board books and picture books on shapes out in the bookstores and the public library! Check out our favourite titles below!

20130914-140347.jpg 20130914-140412.jpg 20130914-140435.jpg

7. Toilet Paper Roll Printing

This activity is so fun and educational! Just create shapes like circle, oval, heart or triangle with the toilet paper rolls, put some paint and your preschooler will be very happy making shape prints all over a canvas or paper!

559931_10151530805678534_424884981_n 199072_10151530805983534_1433573512_n

8. Scavenger Hunt!

Play this interactive game that will send your child seeking for shapes all over the house! Show your child or read out the name of a shape on a card, and ask your child to look around her room for the same shape. This sharpens her observations and heightens her awareness of shapes in her real environment!

IMG_8093

9. Play Dough and Cookie Cutters!

Toddlers and preschoolers will never tire of playing with this malleable material! Just take some cookie cutters with different shapes, and they will be engrossed making the shapes, and learning about them!

IMG_7925 IMG_7965

10. Make you own Shape with Ice-cream Sticks!

Create opportunities for your child to create her own shape using ice-cream sticks! This open-ended construction activity will allow your child to play with shapes and familarise herself with properties of different shapes like the corners and the sides.

Well, have fun exploring about shapes with your little one! Make it fun and learning becomes effortless!


Haze! 20 ideas for indoor activities at home!

The haze is here.. Time to stay indoors and have some fun at home!

Here is a list of 20 activities you can try out with your little ones! And have loads of fun, even when it’s all hazy & gloomy outside!

1. Water Play

Well, it looks like going to the swimming pool is not a good idea with the haze. Your child doesn’t have to feel deprived! Just create a water play area in the bathtub and throw in some water toys! For Rae, I created a game where she scoops up floating Ping Pong Balls with the shovel as fast as she can! 🙂

IMG_6658 IMG_6672

2. Play Dough /strong>

There is endless fun with play dough, sculpting the dough into anything your child can dream up!

3photo

3. Get a pet!

This can be the time to get the pet your child has always wanted! Go assemble a fish tank using pebbles, water plants, and let some lovely guppies or terrapins inhabit it! Your child can have fun learning about pets, as well as learn how to be responsible taking care of the pet!

IMG_6688

4. Plant a seed!

This is easiest science lesson you can create at home about plants! Plant a seed, let your child water it everyday and watch it grow!

5. Crafts & Painting!

Art has got to be Rae’s favourite activities! Present your child with open-ended art materials you can find at home, such as paper plates, paints, glue, scrap paper, tissue boxes, tape and see what your child can create with them!

1photo

6. Block or Lego Play

Another great idea for constructive play! Use your imagination and start building!

IMG_6677 IMG_6682

7. Scavenger Hunt

Write down some clues on post-it notes and ask your child to start searching for the items! It will spark off great excitement in your children as they scramble around the house looking for the items!

8. Bake

Children derive great gratification from baking! Involve the child in making the dough, using cookie cutters, add the toppings and let them watch how they are baked in the oven! And the most irresistible part? Savouring their homemade cookies!! 🙂

Try using the pounded nuts for a pastry- chocolate tartlets!

9. Montessori Sensory Play

Just throw in some toy cars/animals and some sand/beans/penne pasta into a container or bin and watch your child do pretend play with them!

10. Cook!

Cook a simple meal with your child! Help them put on an apron and a chef hat. Involve them in the cutting of the vegetables or fruits using a butter knife. Make them feel like a junior iron chef!

4photo photo

11. Have a picnic at home!

Lay out a picnic mat and some picnic food in a basket and enjoy tea time or snack time with your child! Right at home!

IMG_6692

12. Teach your child games you used to play!

Take your child down your memory lane by playing some nostaglic games you used to play when you were young! Hopscotch, five stones, happy family cards, etc!

13. Camp at Home!

Set up a tent, and put in some sleeping pillows and have a pillow fight in there! Or use the torchlight for some adventure in the dark!

14. Cardboard Box play!

Recycle all the cereal boxes and other cardboard boxes and do constructive play with your child! Make a train, house or even a zoo!

15. Make popcorn and watch a movie together!
Your child will love to make his or her own popcorn and have a movie date with you!

16. Play Dress up!

Take out all the old accessories like hats, gloves, scarves or boots and dress up to be a character!

17. Board Games!

This is one family fun activity that never gets boring! Take out your junior Monopoly game, Pictionary, Boggle, Uno, whatever!

18. Puzzles

Another classic game to play! Completing a puzzle together somehow is a very bonding activity to do with your child! Plus it trains patience and perseverance!

19. Create an art gallery at home!

Take out all the art pieces your child has done in school and put them up like in an art gallery. Ask your child to take you on a tour in his very own art gallery by talking about how it was created, and what ideas it represent! It sure will make your child feel proud!

IMG_6683 IMG_6684

20. Create indoor gym!

You can create your indoor gym at home! Just create an obstacle course with tunnels, little stools, bean bags, hoola hoops! Or pour in lots of plastic balls into the cot and let your child roll in them!